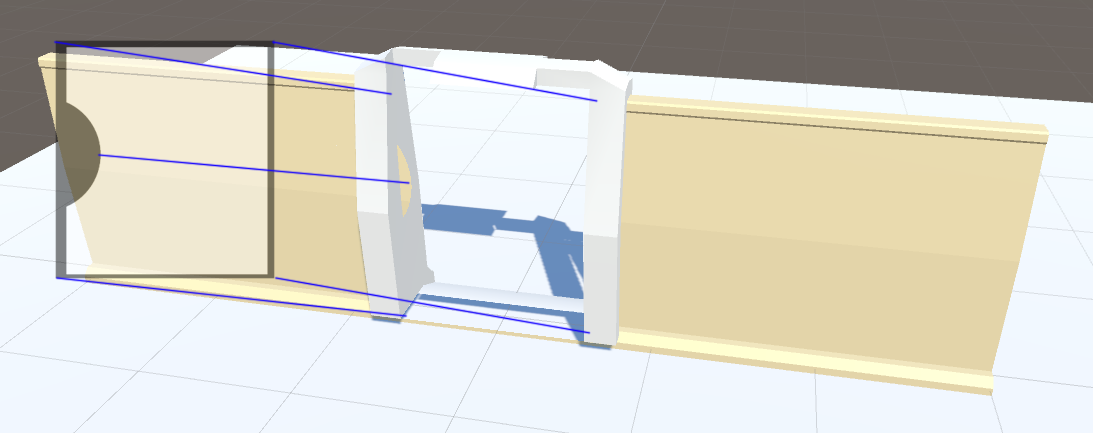
For the game I’m currently working on is a 3D isometric management game where you build rooms on a spacestation. The rooms and spacestation are made up of a series of tilesets so the player can effectively paint out the rooms in any size and shape they wish and the wall tiles are snapped together and appropriately themed based on the room type. All relatively easy stuff at this point. However we also allow the player to place doors and windows, and these objects may be multiple tiles wide. The first solution that came to us was seeing whether we could complexify the tileset system a little to support sub-tilesets that are made up of chucked up doors and windows. After some quick math this didn’t look good – The tileset requirements and combinations were quickly exploding into really big numbers. This could have been possibly mitigated by cutting up the tiles even further and then having some automated tileset builder step that constructs the combinations required. But that sounded no good. There must be another way!

Basking in the shade(r)
The short answer is clip() in a custom shader. The long answer is…long.
Cutting a hole in a mesh with shaders is by itself really easy. However cutting a hole in a mesh in the right position, with a texture mask, at any rotation and scale is hard. Very hard if you’re not a wizard at transform math, which is my position, and as such I must disclaim that some of the code and math here can probably be improved or reduced. Please do contact me with updates if so!
The requirements:
- It needs to extend the Unity3D Standard Shader
- It needs to support a texture mask as our windows could have odd shapes
- The mask may not be symmetrical, so must be projected on to meshes with any rotation
- We cannot rely on the mesh UVs for mask placement, as they could be arranged in any way
- It needs to only run required code as necessary – We’ll have a lot of walls so mind must be paid to performance
- It needs to support shadows and both deferred and forward lighting models
I find it easier to work backwards. So let’s take a look at the shader code first:
inline void CutoutMaskClipper(float3 posWorld, float2 uv) {
	float alphaCutoff		= 0.5;
	float2 localPixelPos	= mul(unity_WorldToObject, posWorld).xy;
	float4 worldObjPos		= mul(unity_ObjectToWorld, float4(0, 0, 0, 1));
	float2 localObjPos		= mul(unity_WorldToObject, worldObjPos.xyz).xy;

	float2 mask1Loc = localPixelPos - (localObjPos + _CutoutMask1MapWorldPos.xy);
	mask1Loc.x = mask1Loc.x * _CutoutMask1MapWorldPos.w;
	float4 mask1tex = tex2D(_CutoutMask1Map, TRANSFORM_TEX(mask1Loc, _CutoutMask1Map));
	clip(mask1tex.a - alphaCutoff);
}
The aim here is to figure out where the mask is in relation to the pixel we’re rendering and then compare it against the right pixel in the mask (If it is in the mask) and clip it or not. Hopefully it is pretty self-explanatory. In my case I’ve duplicated the last 4 lines multiple times to allow multiple masks to stack on a single mesh.
In my custom Unity 5 standard shader I have overridden the frag function of both the forward and deferred passes:
void fragDeferredCustom(
	VertexOutputDeferred i,
	out half4 outDiffuse : SV_Target0,			// RT0: diffuse color (rgb), occlusion (a)
	out half4 outSpecSmoothness : SV_Target1,	// RT1: spec color (rgb), smoothness (a)
	out half4 outNormal : SV_Target2,			// RT2: normal (rgb), --unused, very low precision-- (a)
	out half4 outEmission : SV_Target3			// RT3: emission (rgb), --unused-- (a)
	) {
	#ifdef _ALPHATEST_ON
		CutoutMaskClipper(i.posWorld, i.tex.xy);
	#endif
	fragDeferred(i, outDiffuse, outSpecSmoothness, outNormal, outEmission);
}

half4 fragBaseCustom(VertexOutputForwardBase i) : SV_Target {
	#ifdef _ALPHATEST_ON
		CutoutMaskClipper(i.posWorld, i.tex.xy);
	#endif
	return fragBase(i);
}
Annoyingly, getting the shadows to work requires a little extra effort as the Unity 5 standard shader avoids including the pixel world position by default. So I had to copy UnityStandardShadow.cginc modify a few things to make it work:
struct VertexOutputShadowCaster
{
	V2F_SHADOW_CASTER_NOPOS
	#if defined(UNITY_STANDARD_USE_SHADOW_UVS)
		float2 tex : TEXCOORD1;
	#endif
	float4 posWorld : TEXCOORD2; // Required to enable clipping
};
void vertShadowCaster (VertexInput v,
	#ifdef UNITY_STANDARD_USE_SHADOW_OUTPUT_STRUCT
	out VertexOutputShadowCaster o,
	#endif
	out float4 opos : SV_POSITION)
{
	UNITY_SETUP_INSTANCE_ID(v);
	TRANSFER_SHADOW_CASTER_NOPOS(o,opos)
	#ifdef UNITY_STANDARD_USE_SHADOW_OUTPUT_STRUCT
		o.posWorld = mul(unity_ObjectToWorld, v.vertex); // Required to enable clipping
	#endif
	#if defined(UNITY_STANDARD_USE_SHADOW_UVS)
		o.tex = TRANSFORM_TEX(v.uv0, _MainTex);
	#endif

}
Finally in my custom standard shader:
half4 fragShadowCasterCustom(
	#ifdef UNITY_STANDARD_USE_SHADOW_OUTPUT_STRUCT
		VertexOutputShadowCaster i
	#endif
	#ifdef UNITY_STANDARD_USE_DITHER_MASK
		, UNITY_VPOS_TYPE vpos : VPOS
	#endif
) : SV_Target {
	#if defined(UNITY_STANDARD_USE_SHADOW_OUTPUT_STRUCT) && defined(_ALPHATEST_ON)
		CutoutMaskClipper(i.posWorld, i.tex.xy);
	#endif

	return fragShadowCaster(
		#ifdef UNITY_STANDARD_USE_SHADOW_OUTPUT_STRUCT
			i
		#endif
		#ifdef UNITY_STANDARD_USE_DITHER_MASK
			, vpos
		#endif
	);
}
The Data
Now that the shader is prepared, we simply need to provide it with the data it needs. This took a bit of work as we need to apply a number of transform steps to ensure the target object and mask position are aligned, scaled correctly and within the same transform space:
public List<GameObject> AffectedObjects;
public GameObject TargetCutLocation;
private Vector2 _targetCutOffset = new Vector2(0.5f, 0.0f);

void MakeCut()
{
    AffectedObjects.forEach(obj =>
    {
        var heading = TargetCutLocation.transform.position - obj.transform.position;
        var yDist = heading.y;
        heading.y = 0f;
        var distance = heading.magnitude;

        var dot = Vector3.Dot(heading, obj.transform.right);
        var signedDist = distance*Mathf.Sign(dot);

        var flip = 1f;
        var angle = Vector3.Angle(obj.transform.forward, TargetCutLocation.transform.forward);
        if (Mathf.Abs(angle) >= 180) flip = -1;

        var scale = new Vector2(obj.transform.lossyScale.x / 2, obj.transform.lossyScale.z / 2);

        var wallMat = obj.GetComponent<Renderer>().material;
        wallMat.SetVector("_CutoutMask1Map_ST",
            new Vector4(scale.x, scale.y, _targetCutOffset.x, _targetCutOffset.y));
        wallMat.SetVector("_CutoutMask1MapWorldPos",
            new Vector4(signedDist, yDist, 0, flip)
        );
    });
}
There is a bit of math here and thus it aught not to be run every frame. The great thing is that is only needs to run once for each time the cut location is changed relative to the affected objects. For example you would run this when you place a window or door and that’s it.
And that’s it! There is some more surrounding code that puts all this together and polishes the Unity Editor shader GUI, etc. But this is the meat of the solution. You can buy this shader on the asset store and get updates and fixes automatically here. Or you can download the package for free and go nuts.
Leave a Reply